Lab/Pathology Results Reconciliation
Lab/Pathology results reconciliation is the process of associating incoming lab or pathology results with specimens that were entered in HST eChart. This process is completed in the Lab/Pathology Results Reconciliation tab in the Chart Home area of the patient chart. One specimen may have multiple tests performed and/or multiple specimen results may be reported on one document. As such, the lab/pathology results PDF must be reconciled with the appropriate tests in HST eChart to ensure that all specimen results have been received and they are matched to the correct test. Reconciled results will display in the Lab/Pathology Review (2) BLOC 135.
Jump to:
Setting Patient ID as Default Lab Request ID
Entering Specimens
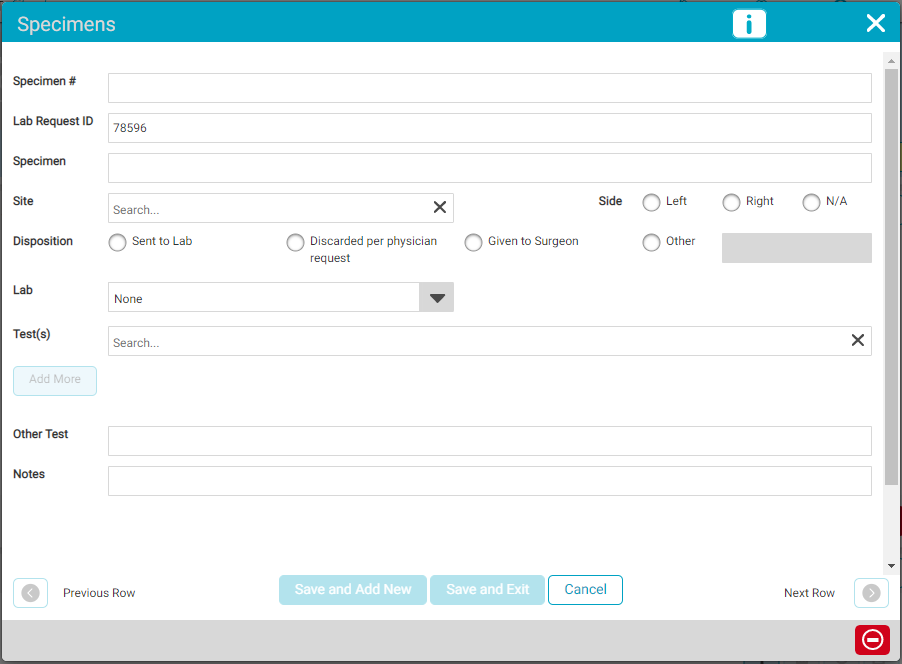
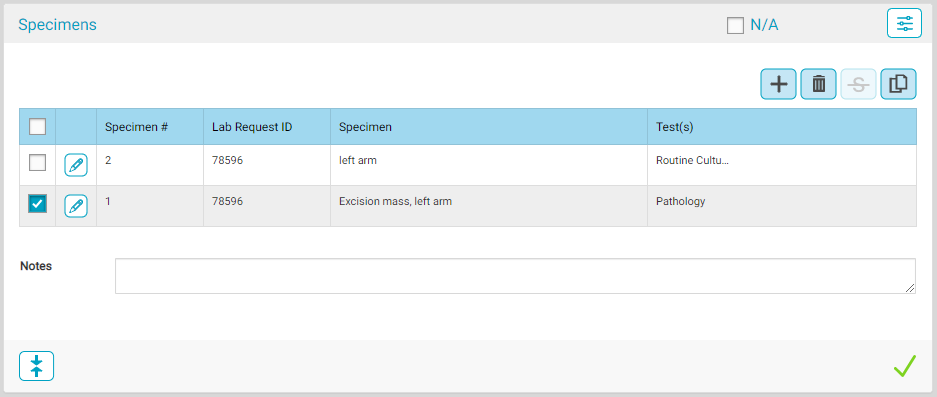
Specimens are entered in HST eChart via the flyout in the Specimen BLOC. The Specimen #, Lab Request ID, Specimen, and Disposition fields are required. If Sent to Lab is selected for the Disposition, then the Lab and Test or Other Test fields are required. All other fields should be filled in according to Center policy.
-
The Specimen # refers to the number of specimens collected. The user can enter each specimen separately or group them according to their Center’s policy. (ex. Specimen #1-contents of left ethmoid sinus, #2-contents of left maxillary sinus, #3-content of left frontal sinus; or Specimen #1-3-content of left sinus cavity)
-
The Lab Request ID in the flyout is what will be used to link the results to the specimen. Some laboratories provide this ID on the lab form completed for the specimen. If the lab slip does not have an ID, or if center policy requires, the Lab Request ID can be the patient’s ID or an alphanumeric option designed by the center. If the Center chooses to always use the Patient ID, eChart can be configured to automatically insert the patient's ID in the Lab Request ID field – see section Setting Patient ID as Default Lab Request ID.
-
Test(s) – More than one test can be selected for a specimen. If more than one test is selected, there will be separate grid items for each test in the Lab/Pathology Review BLOC.
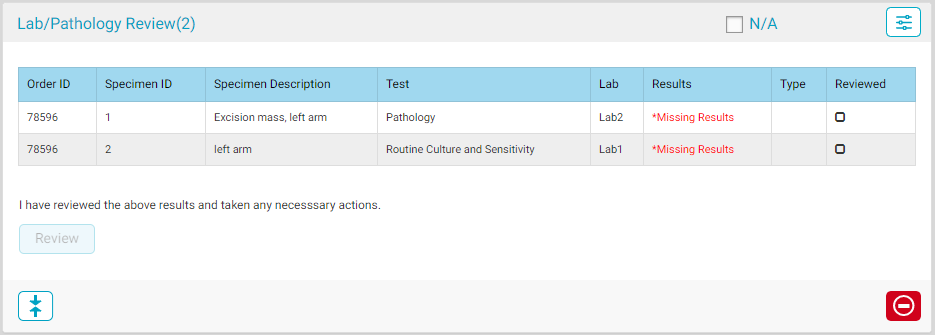
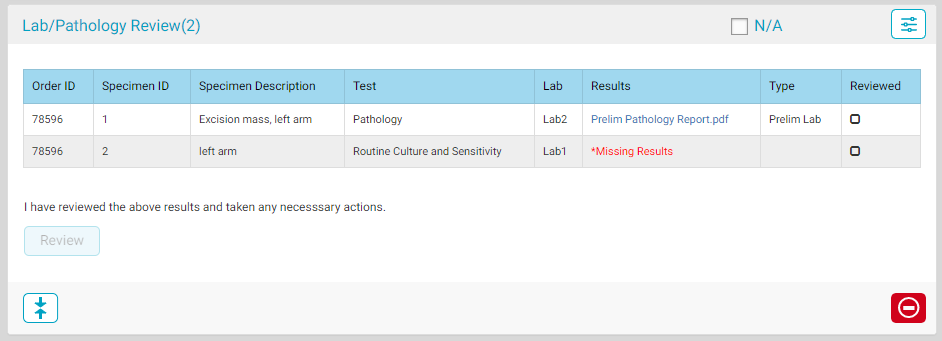
All specimens entered will immediately display in the Lab/Pathology Review (2) BLOC with the Results column showing “Missing Results”. This will be replaced with a link to the associated results in Document Central once results are received and the reconciliation has been completed.
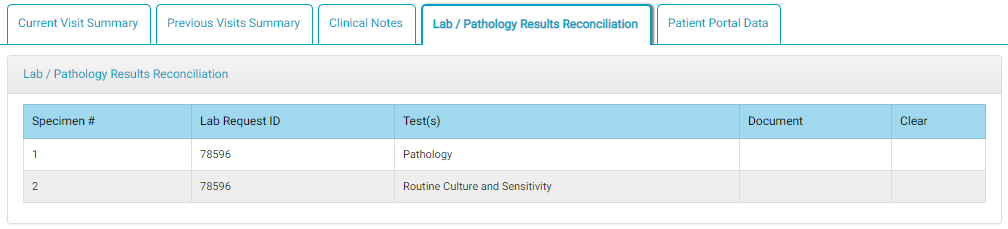
The specimens will also appear under the Lab/Pathology Results Reconciliation tab on the Chart Summary page.
Reconciling Results
Once lab or pathology results arrive, they must be imported into HST Practice Management before being reconciled with the documented tests in HST eChart.
To reconcile results:
- Import the report into Document Central and attach it to the correct patient and visit. To do this, right tap on the visit on the HST Practice Management schedule page and tap “Document Central.”
- Document central will open. Tap the Select Document button.
-
Locate and select the report file and tap the Open button.
-
The file will now display in the left window pane under the Select Documents button. Check the checkbox for the report file.
- Tap to highlight the date of service to which the report corresponds.
-
Tap the Import button.
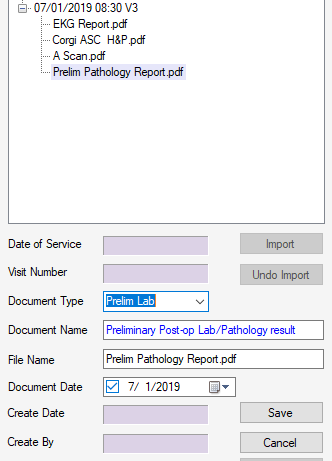
- Select the correct Document Type, either "Prelim Lab – Preliminary Post-op Lab/Pathology Results“ or “Postop Lab – Postoperative Lab/Path Results”. These Document Types are hard coded by HST.
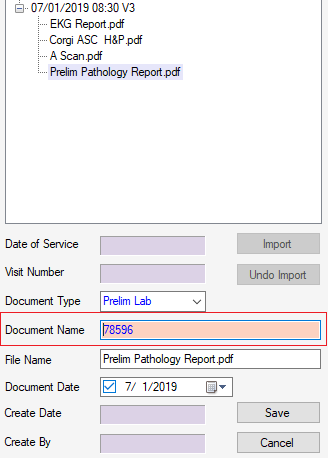
- Replace the Document Name with the EXACT data entered in the HST eChart for Lab Request ID. (If this is not exact, the document will not appear in the Lab/Path Reconciliation Tab.)
- The file name does not have to match the specimen.
- Enter the Document Date and tap save. (The Create Date and Document Date do not have to match. The Document Date cannot be in the future.)
- Log into HST eChart and locate the record that needs results reconciliation.
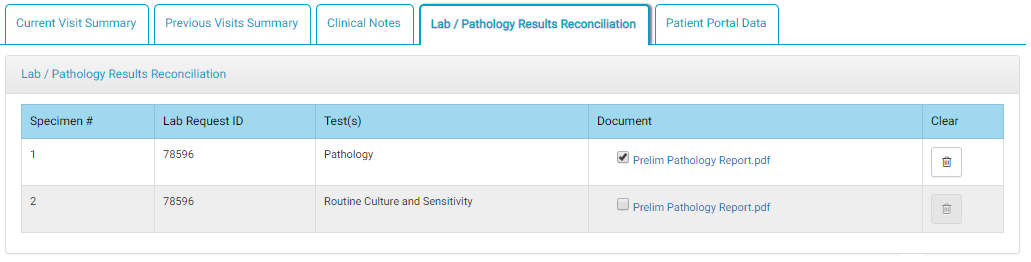
- Navigate to the Lab/Pathology Results Reconciliation tab on the Chart Home page. The document(s) attached in Document Central will be available to link to the specimens.
- Select the checkbox for the document that corresponds to the specimen. If needed, tapping the Document name will open the report so the user can confirm the results are being correctly matched. One document may be matched to more than one specimen. Checking the box links the report with the specimen.
- The matched results will now display in the Lab/Pathology Review BLOC.
- A task will now be generated for the primary provider to review the results. Once all final results are reviewed, the BLOC will be complete.
Setting Patient ID as Default Lab Request ID
If the Center chooses to always use the Patient ID as the Specimen ID, that can be set to default in the Center Configuration in Admin Home in HST eChart.
- In HST eChart Admin Home, navigate to Center Configuration.

- Select the Yes radio button for "Default Lab Request ID to Patient ID."
- Tap the Save button.
- Any new specimen entries in HST eChart will automatically have the Patient ID populate the Specimen ID field.
Troubleshooting
Can’t see the Lab/Pathology Results Reconciliation tab?
- Make sure the user has the EHR Admin – Lab Results Reconciliation permission assigned in HST Practice Management.
Results aren’t showing up in HST eChart?
- Make sure the Lab Request ID from the Specimens BLOC exactly matches the Document Name in for the path results in Document Central.
- Make sure the specimen was entered in HST eChart.